

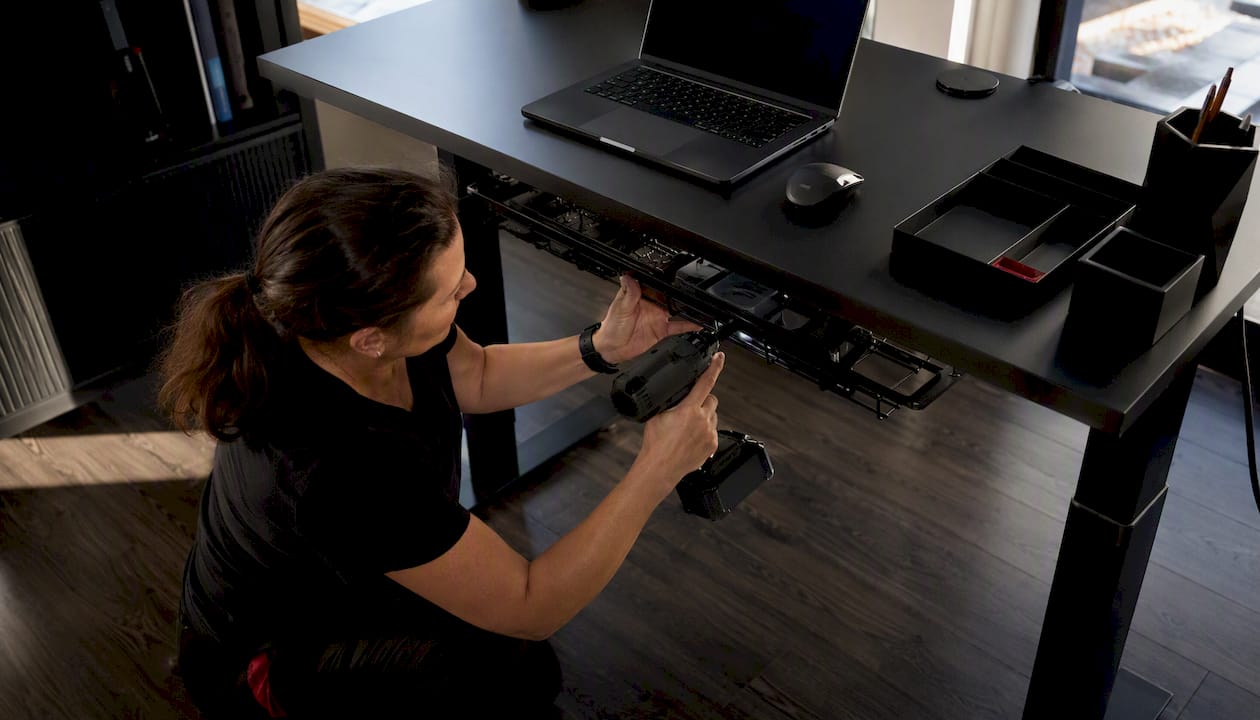
The fastest way to clean up desk cable management is a two-stage approach: spend 10 minutes removing visible clutter right now, then route everything into one hidden hub under the desk. That second step, mounting a power strip to the underside of your desk and feeding all cables into an under-desk tray, is what makes the result last.
Here’s the quick-start sequence:
- Unplug and remove every cable you haven’t used in the past month.
- Lift the power strip off the floor and mount it under the desk or set it in a tray.
- Bundle cables by destination (monitor, computer, phone) with reusable Velcro ties.
- Secure one main slack loop for any cable that needs to travel with a moving desk.
- Clip frequently used cables (mouse, phone charger) to the desk edge so they stay accessible.
Electronic Accessories Outlet carries the cable organizers, Velcro ties, and mounting accessories to execute both stages in a single order. For sit–stand desks, the UPLIFT Desk FlexMount Cable Manager handles vertical travel cleanly, and Mount-It!’s guidance is worth bookmarking for the audit phase.
Pro Tip: Mount the power strip to the underside of the desk before routing anything else. On a sit–stand desk, this means only one cord needs full vertical slack, which cuts snag risk dramatically.
Table of Contents
- What tools and materials do you actually need?
- How do you audit your cables before you start organizing?
- What are the fastest 10-minute fixes to cut visible clutter?
- How do you set up a permanent routing system under your desk?
- How do you keep cables tidy on a sit–stand desk?
- How should you label, shorten, and group cables?
- What does maintenance cost, and how long does it take?
- Which products are worth buying for your specific desk?
- How do you choose the right approach for your desk?
- Key Takeaways
- Why low-cost, modular solutions work better than expensive overhauls
- Get your cable management kit from Electronicaccessoriesoutlet
- Useful sources and further reading
What tools and materials do you actually need?
You can handle both quick fixes and a permanent install with a short list of items, most available at any U.S. hardware or electronics retailer.
Quick essentials:
- Reusable Velcro cable ties (a pack of 20–30 covers most desks)
- Adhesive pop-in cable clips for desk edges
- An under-desk tray or cable raceway
- A mountable power strip with at least six outlets
- Fabric sleeve or spiral wrap for bundled runs
- A label maker or colored electrical tape
- A basic screwdriver (and a drill if you’re mounting hardware)
For sit–stand desks specifically:
- A vertical cable spine or long flexible sleeve that extends and retracts
- A clamp-mount tray so you avoid drilling into the desk frame
Choosing adhesive clips wisely: Pick clips that let the cable pop in and out without unsticking the mount. Fixed-loop adhesive clips tend to damage desk finishes when you eventually remove them, and you will eventually remove them.
Electronicaccessoriesoutlet stocks cable organizers and accessories suited for home-office setups. For trays and raceways, IKEA’s FÖRSÄSONG and SIGNUM lines are widely available in the U.S. and cover most desk sizes at a low entry price.

How do you audit your cables before you start organizing?
Mount-It! recommends starting with a full audit before touching any hardware. It sounds obvious, but most people skip it and end up routing cables they don’t need.
- Identify every device plugged into your desk. List them: monitor, computer, external drive, lamp, phone charger, webcam, speakers.
- Unplug each cable and test whether the device actually needs it. Anything you haven’t used in 30 days goes in a labeled bag or gets donated.
- Inspect for damage. Frayed insulation or bent connectors should be replaced before routing, not after.
- Mark cables as essential or non-essential with colored tape before you start grouping.
- Measure slack for each device. Pull the cable taut from the device to where it will plug in, then add 6–8 inches for a service loop. For sit–stand desks, test the full height range and measure the extra length needed at maximum height.
- Group by destination. Monitor cables together, computer cables together, phone and peripheral cables together. Keeping power and data lines separated where possible reduces interference.
Photograph the back of your desk before you change anything. When something stops working three weeks later, that photo cuts troubleshooting time in half.
What are the fastest 10-minute fixes to cut visible clutter?
These fixes don’t require a drill or a permanent commitment. They make the desk look dramatically better while you plan the full install.
The 10-minute rule: You don’t need a perfect system today. Getting cables off the floor and clipped to the desk edge buys you a cleaner workspace immediately and gives you time to plan the permanent routing without living in the mess.
Lift the power strip off the floor (2–3 minutes). Set it on a desk shelf, clamp it to the desk edge, or rest it in a tray. This alone removes the most visible tangle.
Clip cables to the desk edge (1–3 minutes). Adhesive cable clips or binder clips folded over the desk edge work fine as a temporary guide. Run the mouse cable and phone charger along the edge so they hang neatly instead of pooling on the desk surface.

Add magnetic or weighted cable holders for daily-use chargers (2 minutes). Wirecutter recommends magnetic and weighted desktop cable holders for frequently used charging cables because they keep the connector accessible without leaving the whole cable draped across the desk. Clip the connector into the holder; the cable drops behind the desk when not in use.
Bundle the back-of-desk cables loosely (3–4 minutes). One pass with a Velcro tie around the main cable run behind the monitor makes a noticeable difference. Don’t cinch tightly yet; you’ll adjust during the permanent install.
Pro Tip: Label both ends of every cable while you have them unplugged for the quick tidy. A strip of colored tape or a printed label takes 10 seconds per cable and saves real time the next time something stops working.
Safety note: unplug the power strip before mounting it or handling any wiring near the power connections.
How do you set up a permanent routing system under your desk?
Permanent routing means cables stay hidden, stay organized, and don’t need to be re-done every few months. The core decision is which routing method fits your desk.
Routing options and where each fits:
- Under-desk tray (open-wire mesh style): best for desks with multiple power bricks and adapters. PCWorld’s testing found that open-wire trays outperform closed baskets because they allow flexible routing and better airflow around power bricks, and they make adding or removing devices easier. A basic mesh tray is available at a low entry price.
- Cable raceway (adhesive channel along the wall or desk leg): best for long, straight runs where cables travel from the desk to a wall outlet. Clean and low-profile, but harder to modify later.
- Vertical cable spine or flexible sleeve: best for sit–stand desks where cables need to travel up and down with the desk frame.
- Mounted power strip on the desk underside: works with any of the above. Mount it centered under the desk so cable runs from each device are roughly equal in length.
Installation checklist:
- Center the tray or raceway under the desk, not pushed to one side.
- Route cables along the desk’s natural lines (front-to-back, side-to-side) rather than diagonally.
- Leave the power bricks in the open tray with space between them. Don’t stack or bundle heat-generating bricks tightly.
- Mount the power strip to the underside of the desk so only one cord drops to the wall outlet.
- Use screw mounts where the desk material allows; use clamp mounts on glass or expensive finished surfaces to avoid damage.
Safety note: never route cables where they could be pinched by desk drawers, chair wheels, or moving parts. Leave a service loop at each device so you can disconnect without straining the connector.
How do you keep cables tidy on a sit–stand desk?
Height-adjustable desks introduce a problem that fixed desks don’t have: cables that are perfectly routed at sitting height snag, pull, or unplug when the desk rises.
The primary rule, backed by Mount-It!’s standing desk guidance, is to mount the power strip to the desk underside so only one cord needs to travel vertically. Every other cable stays on the desk or in the under-desk tray, moving with the desk as a unit.
For sit–stand desks, the goal is one vertical cord. Mount the power strip under the desk, route all device cables into the tray, and let a single power cord drop from the tray to the wall. That cord needs enough slack to cover the full height range, plus a few extra inches.
The UPLIFT Desk FlexMount Cable Manager is built specifically for this scenario. It supports up to 10 lbs of wires and adapters and adjusts both vertically and horizontally, making it a practical choice for desks with multiple monitors or heavy adapter loads. Humanscale NeatUp takes a different approach: it automatically adjusts as the desk changes height, guiding cables smoothly without manual re-routing.
After routing, test the full range of motion. Raise the desk to maximum height and lower it to minimum. Watch every cable. If anything pulls taut or catches, add a slack loop at that point before calling the install done.
How should you label, shorten, and group cables?
Good labeling turns a tidy desk into a maintainable desk. The difference shows up the first time you need to swap a monitor or troubleshoot a dead USB port.
- Group cables by run using reusable Velcro ties. One bundle for monitor cables, one for computer cables, one for peripherals. Velcro ties let you add or remove a cable without cutting anything.
- Use spiral wrap for mixed-gauge bundles where cables of different thicknesses run the same path. Spiral wrap accommodates varying diameters better than a sleeve.
- Use adhesive pop-in clips for single cables along the desk edge or underside. These let you remove the cable without pulling the clip off the surface.
- Label both ends of every cable with a label maker or colored tape. A simple naming system works: “Monitor 1 power,” “Monitor 1 video,” “USB hub.” Separating power and data cables where possible reduces interference and makes the label map easier to follow.
- Don’t bend power bricks sharply at the cord entry point. That’s where insulation fails first.
What does maintenance cost, and how long does it take?
| Task | Time | Typical Cost | Notes |
|---|---|---|---|
| Quick visible-clutter sweep | 10–30 min | $20 | Velcro ties, binder clips, adhesive clips |
| Permanent tray/raceway install | 1–3 hours | $20 | Tray, raceway, power strip, mounting hardware |
| Monthly 10-minute check | 10 min | — | Re-tie loose bundles, check for fraying |
| Annual full audit | 30 min | —–$30 | Replace frayed cords, clean dust from bricks |
A monthly 10-minute check keeps the system from degrading. After any major desk change (new monitor, new computer), do a quick re-tie pass. Once a year, pull everything out of the tray, wipe it down, and replace any cord showing visible wear.
Troubleshooting checklist: Reference your before-photo, test devices one at a time, check the label map, and isolate whether the problem is on the power side or the data side before swapping cables.
Safety reminder: replace damaged cables immediately. A frayed cord in a bundled tray is a fire risk, not just a cosmetic problem.
Which products are worth buying for your specific desk?
The right kit depends on your desk type and how many devices you’re running.
- Under-desk tray (mesh/open-wire): Best for dual-monitor workstations with multiple power bricks. The IKEA FÖRSÄSONG handles lighter loads; the IKEA SIGNUM suits longer desks with heavier adapter loads. Both mount under the tabletop with screws.
- Magnetic/weighted desktop cable holders: Best for anyone who plugs and unplugs a phone charger or USB-C cable multiple times a day. Wirecutter-style testing consistently recommends these for keeping connectors accessible without leaving the cable exposed on the desk surface. They are available at an affordable price range.
- UPLIFT Desk FlexMount Cable Manager: The go-to for sit–stand desks with heavy cable loads. It adjusts vertically and horizontally, and keeps the under-desk area organized through the full height range.
- Humanscale NeatUp: An automatic cable management solution for sit–stand desks that adjusts without manual intervention. Worth considering if you change desk height frequently throughout the day.
- Cable raceway: Best for laptop-only setups or single-monitor desks with a long run to a wall outlet. Basic adhesive raceway kits are available at a low price point.
Use-case summary:
- Gamer desk with multiple monitors and peripherals: open-wire tray plus vertical spine plus magnetic holders for controllers and headset cables.
- Dual-monitor workstation: SIGNUM tray, mounted power strip, Velcro bundles by destination.
- Laptop-only setup: adhesive raceway, two magnetic holders, one Velcro tie. Done in 20 minutes.
How do you choose the right approach for your desk?
Run through this checklist before buying anything.
- Do you have a sit–stand desk? If yes, prioritize a clamp-mount tray and a vertical spine or sleeve. Mount the power strip under the desk first.
- How many power bricks do you have? More than three means you need an open-wire tray with airflow space, not a closed basket or tight bundle.
- Do you move devices often? If yes, use Velcro ties (not zip ties) and pop-in adhesive clips (not fixed-loop). You’ll thank yourself the first time you rearrange.
- Do you prefer no-drill installs? Clamp-mount trays and adhesive raceways work on most desks without drilling. Test the adhesive on an inconspicuous spot first on finished wood or glass surfaces.
Before committing to permanent mounting: mock the full routing with loose Velcro ties, raise and lower the desk through its full range, and open every drawer. Live with it for a day. Fix the snags before the screws go in.
Red flags to avoid:
- Bundling heat-generating power bricks tightly together.
- Running power and data cables in the same tight bundle for long distances.
- Using permanent adhesives on a high-value desk finish without testing first.
Key Takeaways
The single most effective move in desk cable management is mounting the power strip under the desk and routing all cables into one tray, so only one cord needs to reach the wall.
| Point | Details |
|---|---|
| Start with an audit | Remove unused cables before buying any hardware; it cuts cost and complexity. |
| Quick fixes first | A 10-minute sweep (lift power strip, clip cables, add magnetic holders) delivers immediate results. |
| Permanent routing | An open-wire under-desk tray with a mounted power strip handles most desks for $20. |
| Sit–stand priority | Mount the power strip under the desk so only one cord travels vertically, preventing snags. |
| Electronicaccessoriesoutlet | Stocks cable organizers, Velcro ties, and accessories to execute both quick fixes and a full install. |
Why low-cost, modular solutions work better than expensive overhauls
Most cable management advice pushes people toward elaborate, expensive systems before they’ve done the one thing that actually matters: removing the cables they don’t need. In practice, a $12 mesh tray and a pack of Velcro ties solve 80% of the problem for most home-office desks. The expensive cable spine or the automatic sit–stand system earns its cost only after the basics are in place.
The modular approach also ages better. Desks change. Devices change. A system built on reusable Velcro ties and pop-in clips can be reconfigured in 15 minutes; a system built on zip ties and permanent adhesive channels requires a full teardown. That flexibility matters more than it sounds when you’re adding a second monitor or switching from a fixed desk to a sit–stand model.
The other thing most guides underestimate is labeling. It feels tedious in the moment, but the first time you need to swap a monitor cable or troubleshoot a dead port, a labeled system pays back every second you spent on it. The photo-before-changes habit is the same idea: free insurance that costs 30 seconds.
Get your cable management kit from Electronicaccessoriesoutlet
Spending an afternoon on a cable cleanup is satisfying. Spending that afternoon hunting for the right Velcro ties, the right tray size, and the right adhesive clips across three different stores is not.

Electronicaccessoriesoutlet carries a curated selection of cable organizers and desk accessories suited for home-office and gaming setups, from Velcro tie packs and adhesive clips to magnetic charging holders and mounting accessories. The store is built around the idea that you should be able to buy a complete starter bundle in one order and get to work. If a specific item isn’t listed, you can email or call the team directly and they’ll source it for you at an affordable price. Browse the full selection at electronicaccessoriesoutlet.com and pick up everything you need to go from tangled to tidy in a single session.
Useful sources and further reading
These are the primary references used throughout this guide.
- This $12 cable tray fixed the mess behind my desk | PCWorld — hands-on tray testing, open-wire vs. closed basket trade-offs, and the troubleshooting benefit of a tidy under-desk setup.
- How to Organize Cables Under Desk — Mount-It! — audit methodology, power strip mounting guidance for sit–stand desks, and labeling best practices.
- How to Organize All Your Cords, Cables, and Wires | Wirecutter — magnetic and weighted desktop cable holder recommendations for frequently used charging cables.
- FÖRSÄSONG cable management tray — IKEA — dimensions and mounting details for the entry-level IKEA tray option.
Quick reference: For sit–stand routing, start with the Mount-It! guide and the UPLIFT FlexMount product page. For tray selection, the PCWorld hands-on and the IKEA product pages cover the main options at both ends of the price range.